


Need to download a RingCentral webinar or video meeting?
Webinars are a big part of doing business today.
Not only are more and more companies using webinars to educate customers in a live setting, but they’re also perfect for sharing with people after the fact.
And according to recent webinar statistics, 25% of people will watch a webinar replay after the original broadcast is over.
However, watching webinar replays is often inconvenient.
For example, most replays require some sort of login or opt-in prior to viewing. This can be annoying if you’re trying to share a broadcast with a bunch of people.
Also, webinar replays are typically embedded in-browser which makes it seemingly impossible to “save for later” (on your desktop or the cloud) or watch via mobile.
If you’ve been trying to figure out how to download a webinar replay, don’t sweat it. We’ve got you covered.
Enhance Customer Satisfaction with Smarter Conversations! 🌟
Download our eBook, “Smarter Conversations, Happier Customers,” to explore how AI-driven communication can elevate your customer service. Learn strategies to improve interactions, boost satisfaction, and drive loyalty.
Get your free copy now! 📥
4 easy ways to download a webinar video
Below are four ways to grab a webinar replay recording, all of which are pretty straightforward. They range from options that don’t require third party tools, to webinar software tools that have built-in recording features.
Option #1: Save instant recordings of self-hosted webinars
To kick things off, let’s break down how to quickly down webinar replays that you’ve hosted yourself.
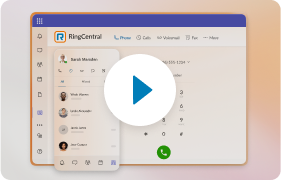
Businesses of all shapes and sizes should consider having some sort of dedicated webinar tool. For example, RingCentral makes it a cinch to put on webinars that include features like interactive chat, polls, and in-depth analytics:
Let’s say you have a broadcast you want to save for later or share with your team. Recording a webinar replay directly within RingCentral can be done with just a couple of clicks.
During any RingCentral broadcast, simply click the red circular button and boom! Your video will begin recording:

You can pause and resume your recording as-needed, too. The red timer highlights how long your recording has been going on:

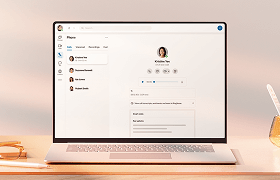
You can either stop the recording manually or end your video meeting: either way, the recording will automatically store itself as an .mp4. From there, you can either share it within your RingCentral account or via email with a sharing link:

And that’s it! Another upside of using RingCentral is that it’s not just a webinar tool. For example, you can use it for video conferences and screen sharing with your colleagues and clients, too. Whether it’s a video meeting or your latest webinar, RingCentral keeps everything stored and ready-to-share within a single platform:

🕹️ Get a hands-on look at how to run webinars and record them on RingCentral (along with other neat features like video conferencing, messaging, and more) by booking a product tour:
Option #2: Use a screen-recording tool to record the replay yourself
Now we’ll break down how to record a webinar for later viewing using a screen recorder.
One tool you can use is OBS Studio, a surprisingly powerful free solution. Although this app is intended for gamers, its built-in features allow you to download screen recordings as well.
First thing’s first: find a webinar and then open OBS Studio. Look for the “Sources” tab, which is second from the left on the bottom of the screen:

Click the “+” to add a video source and, in this case, select “Display Capture”:

From here, you’ll be able to preview the screen you’re going to be capturing video from. This setup is a bit easier if you have a dual monitor display, but you don’t necessarily need that. Go ahead and full-screen your webinar (if possible), then preview it:

You can easily drag and adjust the size of the video to make sure that it takes up an appropriate amount of your screen. Double-check that your desktop audio is on and select “Start recording” in the lower right-hand corner:

Once your webinar is finished and you stop recording, your replays will default to your computer’s “Videos” folder. And that’s that!
The obvious upside to this method is that you don’t have to worry about weird embedded file types that other video downloader tools can’t (or won’t) detect. Rather than fight with downloader tools or extensions, recording your desktop directly is basically fool-proof.
There are a few disadvantages, though. The biggest is that screen recording isn’t exactly time-efficient.
Sure, if you’re watching a webinar for the first time, then simply running a recording alongside your first viewing is easy enough.
However, if you’ve already sat through the presentation, this might be a bit tedious.
Of course, you can always just walk away and let the recording play. Keep in mind that even if you’re using a second monitor, you can still interpret the recording via notifications and other desktop sounds (such as music apps, other videos, etc).
Stay informed with RingCentral
Option 3: Copy a YouTube webinar replay URL into a video downloader tool
YouTube is the go-to option for many businesses looking to upload their webinar replays.
Whether it’s embedded on-site or available on YouTube directly, downloading a replay is easy enough. The obvious advantage of being able to download a YouTube video directly is that it can be done quickly without having to watch the entire thing yourself.
For this guide, we’ll be using 4K Downloader. There are some copy-and-paste browser tools available, but many of them are riddled with pop-ups and malware, so watch out.
The principle of 4K Downloader is simple: copy-and-paste the URL of your webinar replay from YouTube, select your file type, and download.
Here’s what the process looks like. First, open up your webinar on YouTube and copy the URL:

Once you open 4K Downloader, you’ll be prompted to paste your link. Do it!

Then, you’ll be asked to choose your preferred video quality, file size, and destination. When in doubt, err on the side of a higher-quality video:

Once you’ve decided all of the above, click “Download” and let the tool work its magic:

When finished, the final video will be available in your chosen destination folder. 4K Downloader allows you to download up to 30 videos a day for free, which is generous. Unless you’re watching webinar replays all day and every day, you’ll likely never reach that limit.
Option #4: Use in-browser “Developer Tools” to download webinar replays
Can you save a webinar directly from your browser without any third-party tools?
The short answer: yes, sometimes.
Most webinar tools and providers purposely embed their videos in a way that they can’t be downloaded.
However, it is possible to download some webinar replays without any apps. We saved this option for last because it is perhaps the least reliable these days.
For this example, we’ll be using “Developer Tools” in Google Chrome. Make sure you’ve temporarily disabled any ad-blocking software before trying this method.
First, go ahead and open a URL with an embedded webinar:

Then, use the “F12” key to open up Developer Tools on the right-hand side of your screen:

From here, select the “Media” tab. This will allow you to see any and all embedded media files on any given page. Then, hit “F5” to refresh the page:

If available, you should see video file formats such as .mp4 pop up. Simply open the video file in a new tab, which should then autoplay your webinar replay. You can then save the video via right-clicking.
Again, this method doesn’t always work, but it’s super convenient when it does.
Now you know how to download a webinar replay!
Being able to download a webinar makes broadcasts easier to share and likewise means jumping through fewer hoops when you want to watch a replay.
With these four tactics in mind, you have options to download webinars from anywhere and everywhere.
And by the way, don’t forget to check out RingCentral’s own webinar software. Our solution makes it a cinch to put together live and pre-recorded webinars to keep your customers glued to their screens.
Updated Mar 13, 2025